
Page still under construction
Project Synopsis
Alex obtained our current living space with a mortgage just a year ago, and we moved in just prior to the end of 2010.
We do not intend to stay here too long, and ideally would like to embark in the future on seeking or creating other living arrangements more in keeping with our ideal life path before our 8 month old son is of the age at which conventional schooling begins. Our joint aim is to add value to the building and garden whilst blending in permaculture principles wherever possible.
We are likely to be here for a couple of years, and as there is a lot going on elsewhere in our lives, it is also our objective to make our living space and garden a comfortable place to relax, be productive and creative as well as an inspiring and engaging environment for our son to grow and develop.
The first stages of surveying, assessing, designing and implementing can be viewed here.
Design - Garden
Garden considerations mind map
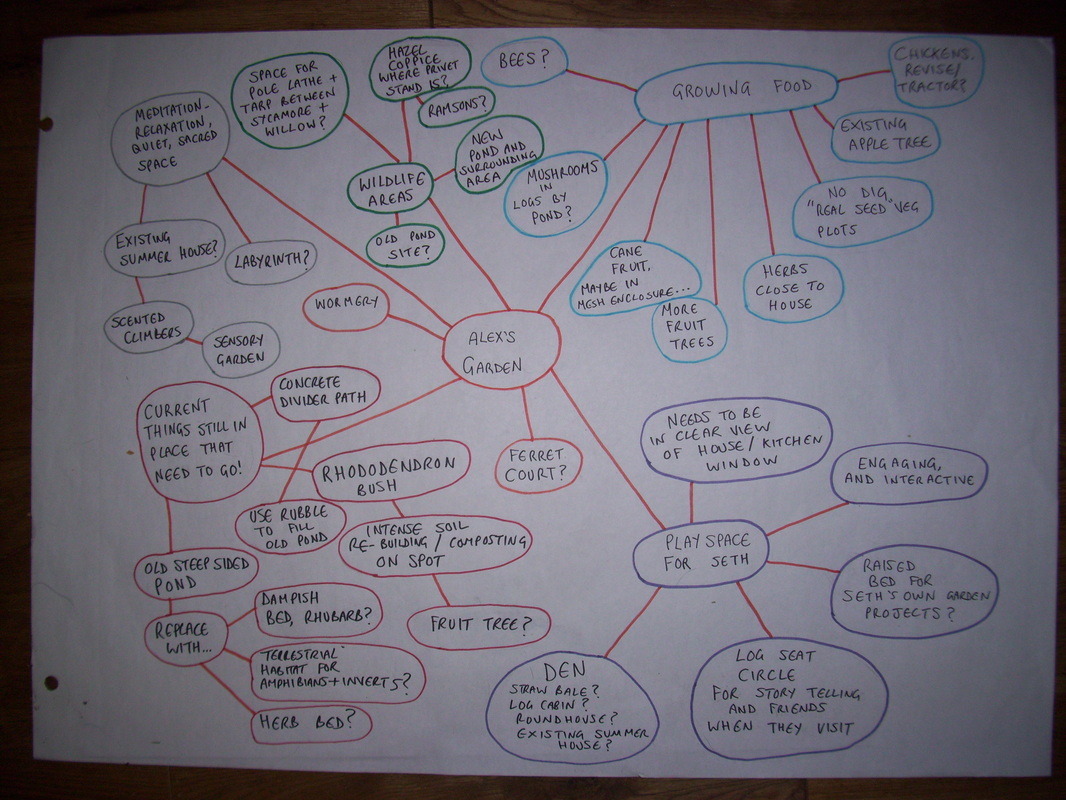
We decided to put our main considerations and requirements for what we wanted out of the garden on paper.
To the right is the first rough mind map that we created.
It breaks down into subject areas such as;
Other considerations are an exercise court for our team of ferrets, and a wormery.
There should have also been included a category for work and storage space....
To the right is the first rough mind map that we created.
It breaks down into subject areas such as;
- Growing food
- Play space for Seth (and us!)
- Wildlife areas
- Meditation, Relaxation, Quiet sacred space &
- Current features still in place that need to go!
Other considerations are an exercise court for our team of ferrets, and a wormery.
There should have also been included a category for work and storage space....

Monitor and Evaluate
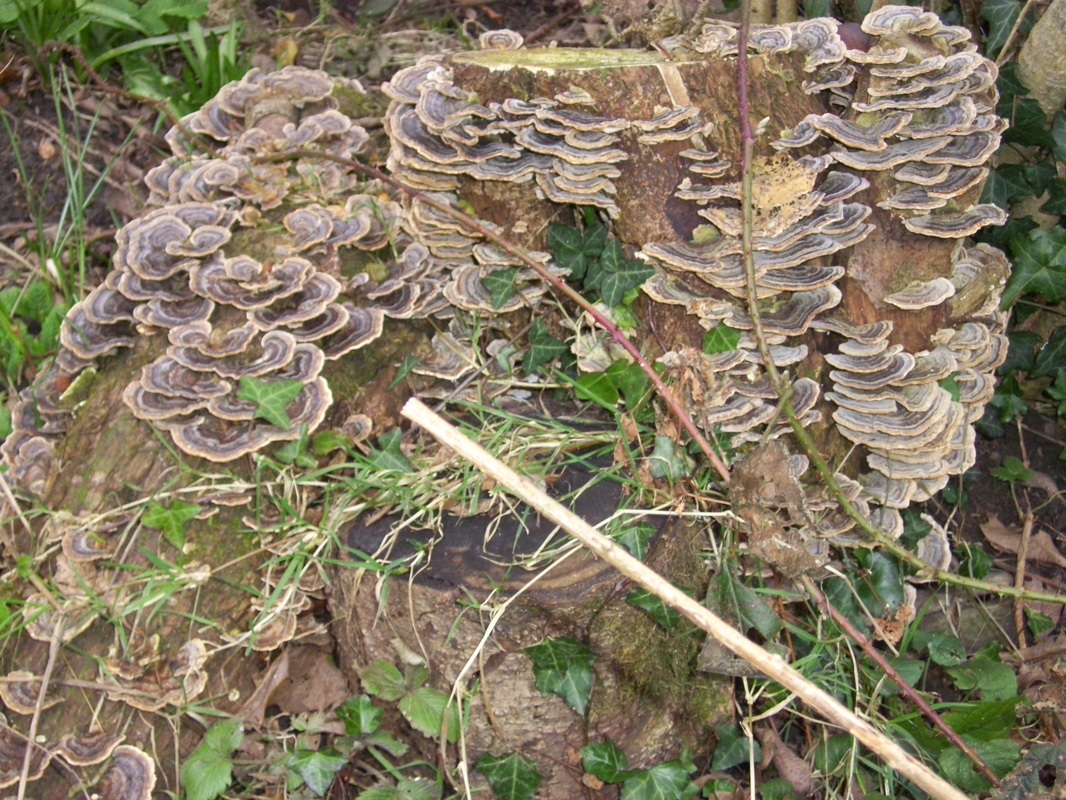
During the winter months, the majority of the work implemented has been based around the house work indoors. Work on the garden has been minimal, other than observing nature`s reaction to changes made last year. The newly created wildlife pond in particular is showing fantastic evidence of stimulating biology. The fungi on the left has developed and spread throughout the habitat/log pile created around the pond and is clearly thriving in the humid pond side atmosphere.
We plan to utilize this observation later in the year an begin an edible mushroom cultivating project.
To recap, the pond was created early last year to provide alternative habitat for amphibians and invertebrates. I use the word alternative as a pond is already in existence elsewhere in the garden closer to the house. The old pond is steep sided and made from concrete. It is very badly designed, and it`s steep sides make it difficult for wildlife to navigate and a risk for children. The old pond will be removed very soon.
It has been left as long as it has as;
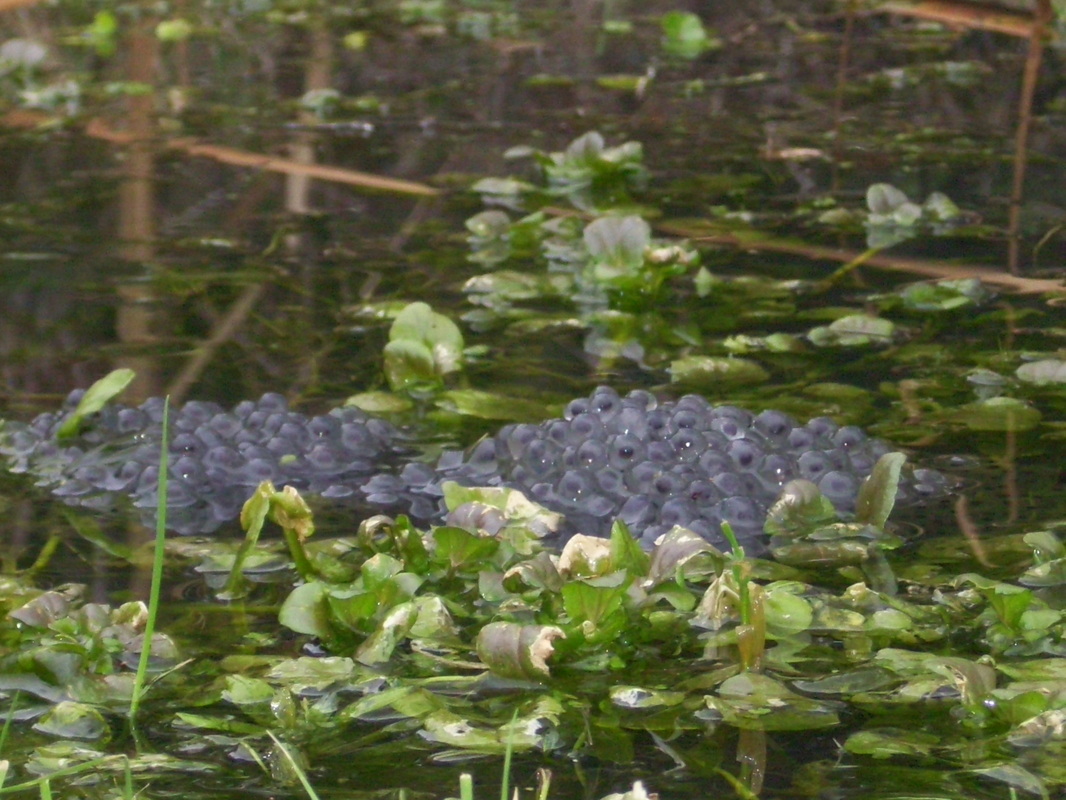
In the last few days, it has been confirmed that the new pond is a success, at least as far as frogs are concerned. Frogs arrived and have begun spawning. I was expecting to have to wait until the frogs had spawned in the old pond (the traditional spawning site for this colony of frogs) and to then transfer the spawn from the old pond to the new pond a few yards away. Although the new pond is far more suitable for frogs than the old, it is apparently sometimes the case that old habits die hard. However, I am delighted to say that so far, the frogs have chosen on their own accord to completely ignore the old pond with it`s steep concrete sides and have spawned in the recently created "amphibian friendly" pond with it`s surrounding habitat that is also amphibian friendly. Its a wonderful feeling to create a pond especially designed for amphibians, and for the animals to make the choice themselves to utilize it the very next year!
Last night there were three clumps of spawn in the pond, and another pair of frogs in amplexus (spawning embrace) amongst the spawn.
The picture below is of the first two clumps of spawn to appear four days ago. More has appeared since.
We plan to utilize this observation later in the year an begin an edible mushroom cultivating project.
To recap, the pond was created early last year to provide alternative habitat for amphibians and invertebrates. I use the word alternative as a pond is already in existence elsewhere in the garden closer to the house. The old pond is steep sided and made from concrete. It is very badly designed, and it`s steep sides make it difficult for wildlife to navigate and a risk for children. The old pond will be removed very soon.
It has been left as long as it has as;
- It was the only habitat available for aquatic invertebrates and amphibians
- Seth, my son is not yet old enough to walk or crawl and so it does not present a danger to him yet.
In the last few days, it has been confirmed that the new pond is a success, at least as far as frogs are concerned. Frogs arrived and have begun spawning. I was expecting to have to wait until the frogs had spawned in the old pond (the traditional spawning site for this colony of frogs) and to then transfer the spawn from the old pond to the new pond a few yards away. Although the new pond is far more suitable for frogs than the old, it is apparently sometimes the case that old habits die hard. However, I am delighted to say that so far, the frogs have chosen on their own accord to completely ignore the old pond with it`s steep concrete sides and have spawned in the recently created "amphibian friendly" pond with it`s surrounding habitat that is also amphibian friendly. Its a wonderful feeling to create a pond especially designed for amphibians, and for the animals to make the choice themselves to utilize it the very next year!
Last night there were three clumps of spawn in the pond, and another pair of frogs in amplexus (spawning embrace) amongst the spawn.
The picture below is of the first two clumps of spawn to appear four days ago. More has appeared since.
The common frog (Rana temporaria) has a fascinating life cycle, and I am not just talking about the egg to tadpole to frog metamorphosis that most people are aware of. I have been frog watching for many years, and have made a few observations. If you are interested, find out more here.
Implement - house
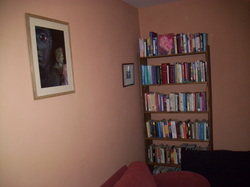
As far as implementation is concerned, work has continued on the house. We now have the back room almost completed as a quiet place for reading and researching. It also doubles as a room in which guests can stay which has already proven useful by providing a comfortable space for family visits.
The room will also serve as a consulting room for Alex to once again begin practising homoeopathy.
It also serves well for someone to shut themselves away and sleep should they need to!
The room will also serve as a consulting room for Alex to once again begin practising homoeopathy.
It also serves well for someone to shut themselves away and sleep should they need to!
Curtain poles have been made throughout...
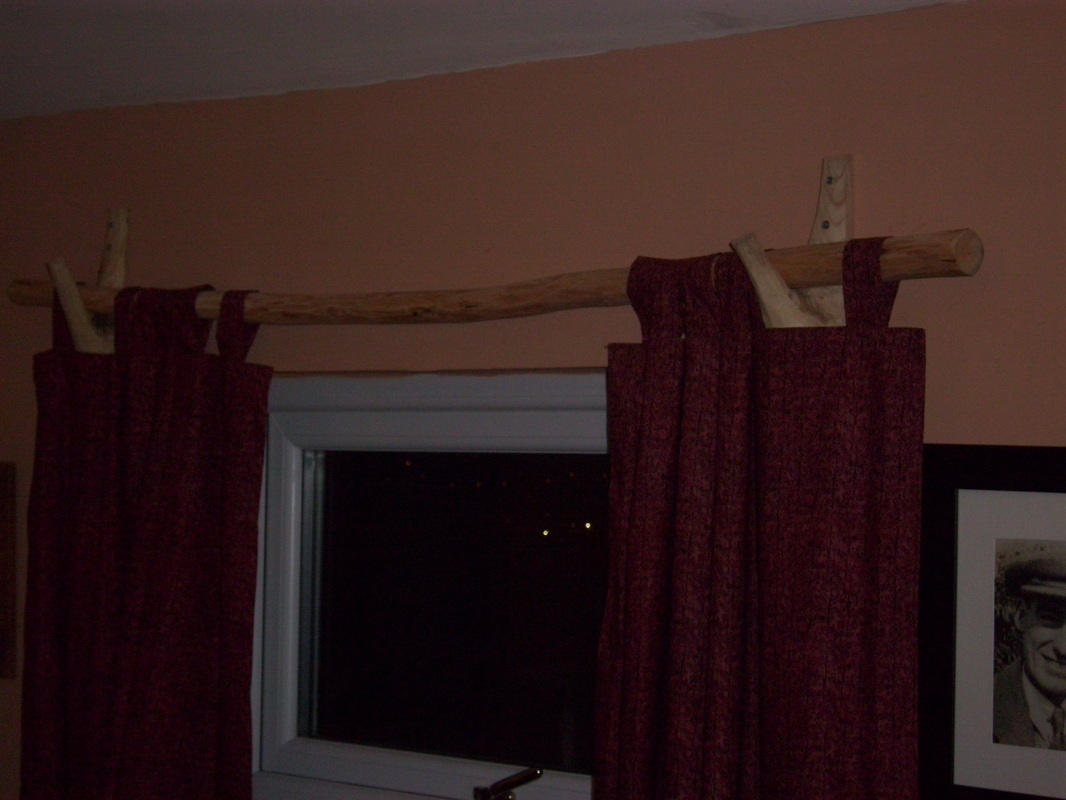
I used a shave horse and draw knife to create the poles out of green coppice. The curtain pole supports were made from junctions formed at the point where a branch leaves the main trunk. I had previously saved a number from a batch of timber that I felled last year for somebody. The same batch of timber has kept us in logs all winter also.
I used the shave horse and draw knife to prepare the junctions/supports. I then cleaved the junctions with a froe and beetle (greenwood working tools explained here) and sanded the poles and supports down with a coarse sand paper afterwards.
In this manner I have made curtain poles and supports throughout the house at no cost at all. The process of using green wood working techniques is incredibly therapeutic. Seth, our 8 month old son has enjoyed watching the whole process, which also produces a pile of bark shavings which make great tinder for fire lighting.
Detail of curtain pole and support made from green wood in another room of the house.
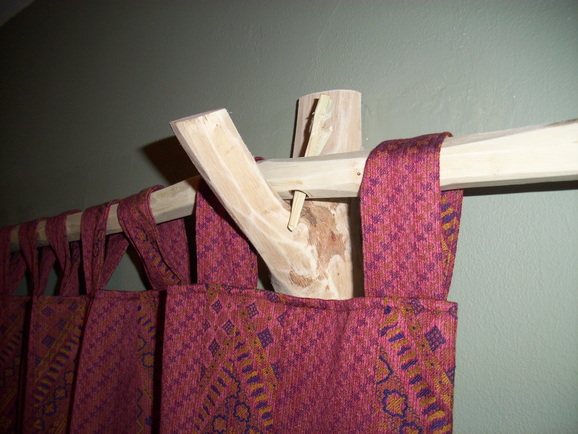
I drilled a hole through the pole itself and made pegs to go through the hole and secure the pole. I made the pegs with a hand axe from off cuts of the pole itself.
You can still see a small area of bark in the "elbow" of the support.... a small slice of nature brought into the house.
You can still see a small area of bark in the "elbow" of the support.... a small slice of nature brought into the house.
Staircase
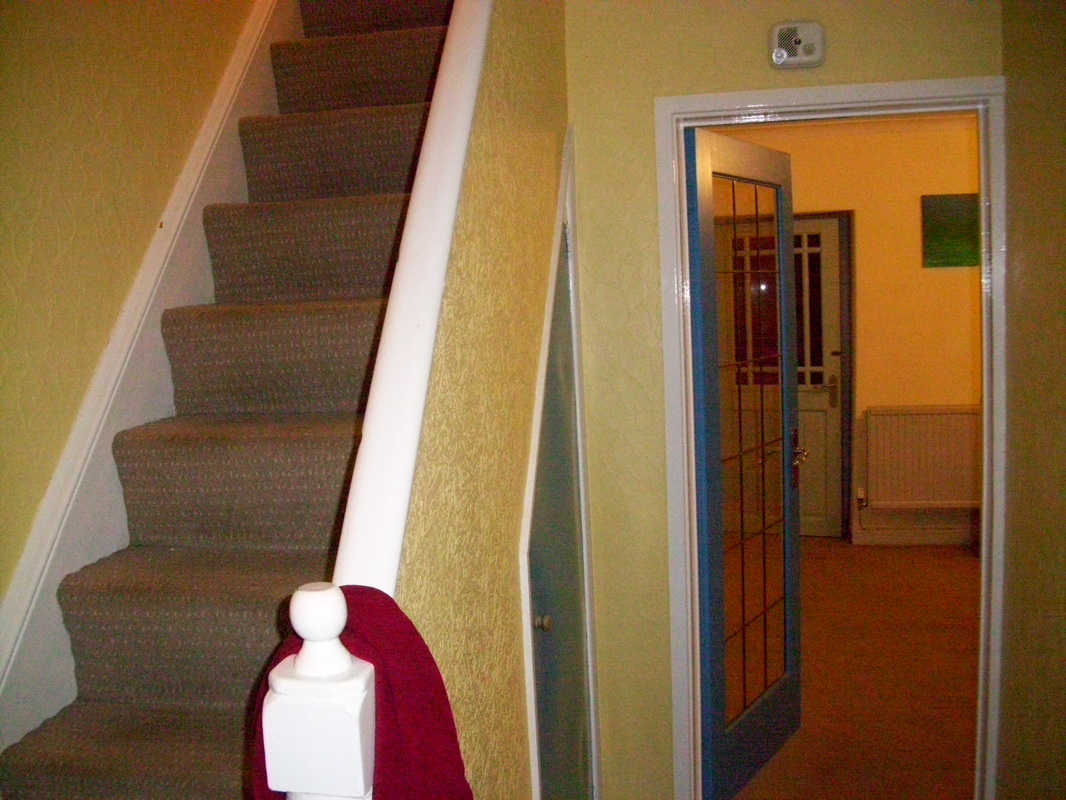
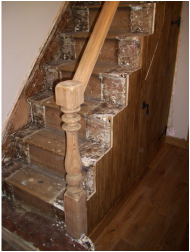
Here is the staircase when we first moved in.
Boxed in with hardboard, wall papered with heavily patterned paper and painted with several layers of brightly coloured paint it had the overall effect of being pretty cold, stark and characterless.
Boxed in with hardboard, wall papered with heavily patterned paper and painted with several layers of brightly coloured paint it had the overall effect of being pretty cold, stark and characterless.
Here is another view...
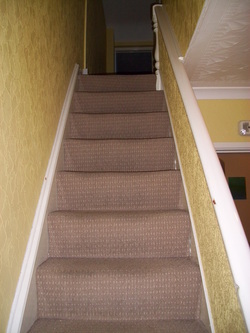
Pretty depressing! The ceiling was covered with more gaudy artex patterns, and the Michael Angelo of the artex world had obviously let loose his talents here previously.
It got shabbier as we worked on other areas of the house, and the stair carpet ended up covered with black stains as I spilt water from the radiators when we renovated the heating system and cleaned the radiators out.
It was the first thing that greeted you when entering the house.
Our plan was to uncover as much of the fabric of the old house as possible, renovate and repair where necessary, and complete the project with a warm inviting entrance to our home. It would also have a welcoming energy for Alex`s Homoeopathy clients.
So work began with Cean smoothing over the ceiling with plaster and covering the head-ache-inducing artex with a simple plain smooth finish.
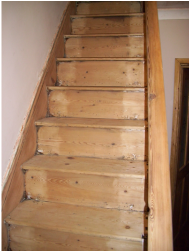
Wall paper stripped....
...walls painted, paint stripped from staircase, hardboard removed, broken up and composted to reveal no spindles! Bannister was stripped of paint and sanded by hand. The smell of the old pine was uplifting when sanding the bannister. The wood was allowed to breathe once more upon being released from several layers of paint.
The cupboard beneath the stairs had to be completely rebuilt and was given a nourishing coat of bees wax.
The next stage was to sand the stairs themselves...
The cupboard beneath the stairs had to be completely rebuilt and was given a nourishing coat of bees wax.
The next stage was to sand the stairs themselves...
...Stairs sanded!
Already it is beginning to feel warmer, friendlier and more welcoming.
Having so much wood exposed and so much of the original fabric of the house unveiled to breathe again felt positive and regenerative.
Work in progress....
...and another view of the stairs before a final round of sanding.
The next stage would be to add some spindles.
The next stage would be to add some spindles.
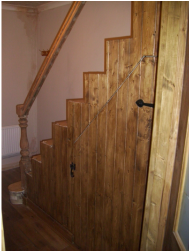
Spindles added....
...and a nourishing coat of bees wax given to the spindles and hand rail/bannister.
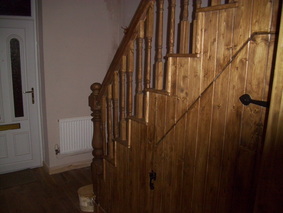
The staircase project is nearing completion.
Hearing and feeling the wood creak and breathe is a beautiful experience following on from the previous experience of gaudy patterned wall paper, artex and suffocating paint!
The staircase project is nearing completion.
Hearing and feeling the wood creak and breathe is a beautiful experience following on from the previous experience of gaudy patterned wall paper, artex and suffocating paint!
The room intended for Seth`s playroom.
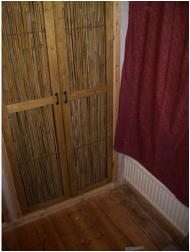
A new airing cupboard has been built. Bamboo cane was used as part of the door to let the cupboard breathe. We created an airing cupboard by adding a small radiator and building the cupboard (with vented bamboo doors) around it.
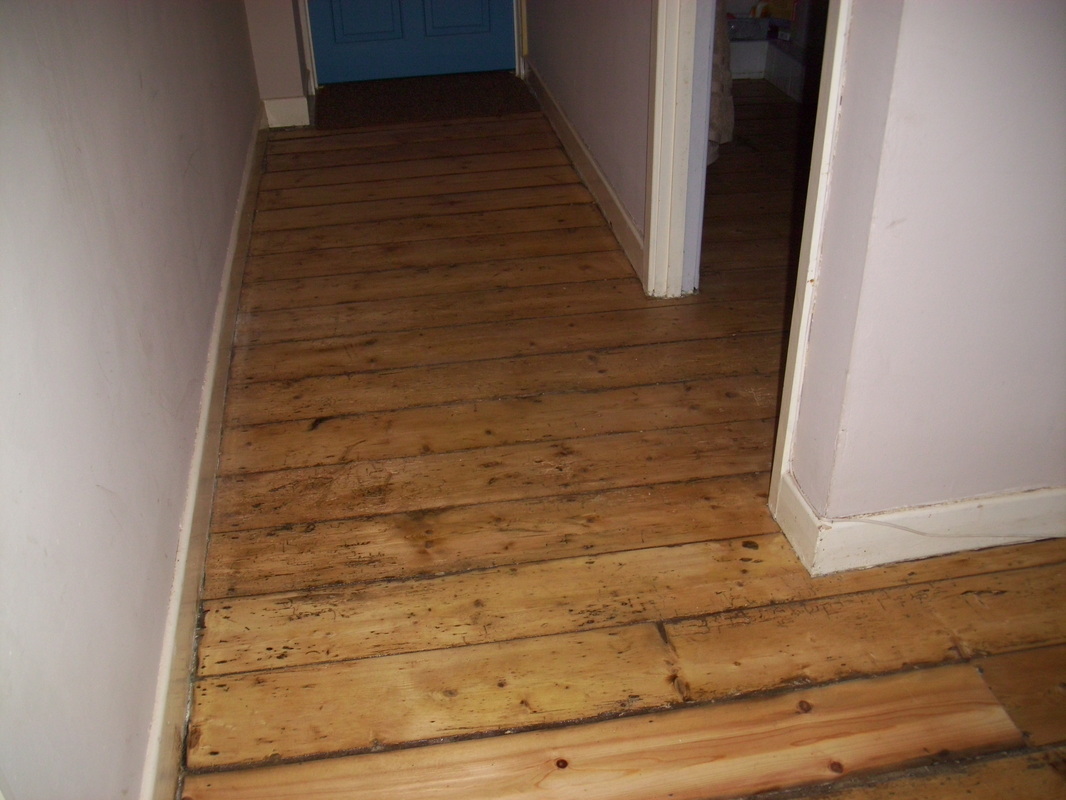
Floor sanded back.
Curtain poles made and curtains hung.
Still to do;
Bees wax skirting boards and airing cupboard surround. Decorate.
Floor sanded back.
Curtain poles made and curtains hung.
Still to do;
Bees wax skirting boards and airing cupboard surround. Decorate.
Floors sanded back throughout the upstairs landing and bathroom.
Things left to do indoors;
- Finish room for Seth
- Renovate/replace badly fitting doors to spare room, bathroom and downstairs cupboard
- Sand back skirting boards and door linings
- Renovate bathroom
- Partial renovation of kitchen
- Organize back porch as tool store/fire wood processing area
